
Water Mitigation | Flood Restoration Company
Water mitigation is the act of preventing water from doing long term damage. The initial flood may cause a lot of damage but the long term effects can be far more severe. When a home or building has been compromised by water there are 3 critical steps. The first is to stop the source of the flood. Second is to mitigate the size of the loss. Water mitigation cannot begin until the source of the incident is stopped. Once the source is stopped water mitigation should begin immediately. Only after the water has been completely mitigated can the flood restoration begin. If flood restoration begins prior to the structure being completely dry long term problems will occur.
Flood Restoration Category 1 Water Loss
WARNING: There are significant health risks as well as a high chance of injury associated with the water damage restoration process. There are also additional health risks, including severe illness and death, associated with improperly drying the structure, as there is the potential for toxic mold to be left behind as well as structural instability.
No two water losses are alike, and each situation must be treated based on the unique needs of the environment. Before tackling any water loss it is recommended that professionals attend an IICRC WRT Class, an IICRC ASD Class, and be familiar with the industry's standards of care (IICRC S500 and S520).
Category 1 water losses originate from a sanitary water source and do not pose substantial risk. It is important to remember that even if the water loss was clean, the nature environment or the time passed since the damage occurred can change the classification of the loss to Category to 2 or Category 3.
Basic Procedure
- Complete work contracts. No work should be started without completed authorizations.
- Identify all safety hazards (electrical wires in standing water, loose/buckling drywall, etc.).
- Locate the source of the water and stop any further intrusion. It may be required to contact a professional plumber or other contractor.
- Protect furniture by blocking. Small items can be moved out of the affected area.
- Extract water from carpet/pad using a sub-surface extraction tool. Remove water from hard surfaces via squeegee or mop. All dehumidifiers should be turned on to give the coils time to reach dew point temperature.
- Inspect all areas that water may have traveled to, and document all moisture levels in affected areas.
- Create a drying chamber. Remember, you only want to dry the areas that are wet.
- Install air movers (approx every 10-15 linear feet). All air movers should be blowing in the same direction.
- Monitor the job daily. Record all drying data and keep accurate records.
- Dispose of any non-dryable items. Ensure you document and have approval of the homeowner/insurance company first.
- If any carpet/pad was removed, reinstall it after drying is complete.
- After drying is complete, all affected areas will need to be cleaned. After drying and thoroughly cleaning any affected carpet, it is recommended to re-apply Scotchgard Carpet Protector.
Flood Restoration Category 2 Water Loss
WARNING: There are significant health risks as well as a high chance of injury associated with the water damage restoration process. There are also additional health risks, including severe illness and death, associated with improperly drying the structure, as there is the potential for toxic mold to be left behind as well as structural instability.
The following information is intended for use as general guidelines for Category 2 water loss cleanup. No two water losses are alike, and each situation must be treated based on the unique needs of the environment. Before tackling any water loss it is recommended that professionals attend an IICRC WRT Class, an IICRC ASD Class, and be familiar with the industry's standards of care (IICRC S500 and S520)
A Category 2 water loss refers to a source of water that contains a significant degree of chemical, biological, or physical contaminants and causes discomfort or sickness when exposed or consumed. Known as "Gray Water," this type of water damage carries microorganisms and nutrients of microorganisms.
Sources of Category 2 water losses include toilet bowls with urine (no feces), sump pump failures, seepage due to hydrostatic failure, and water discharge from dishwashers or washing machines.
Basic Procedure
- Complete work contracts. No work should be started without completed authorizations.
- Identify any safety hazards (electrical wires in standing water, loose/buckling drywall, etc.).
- Locate the source of the water and stop any further intrusion. It may be required to contact a professional plumber or other contractor.
- Protect furniture by blocking. Small items can be moved out of the affected area.
- Extract water from carpet and/or pad by using a sub-surface extraction tool. Remove water from hard surfaces via squeegee or mop. All dehumidifiers should be turned on to give the coils time to reach dew point temperature.
- Apply a biocide to all affected surfaces to help prevent and retard the growth of microbials.
- Remove and dispose of carpet pad from all affected areas. Remove and discard all non-dryable structural materials.
- Inspect all areas that water may have traveled. Document all moisture levels in affected areas.
- Create a drying chamber. Remember, you only want to dry the areas that are wet.
- Install air movers (approx every 10-15 linear feet). All air movers should be blowing in the same direction.
- Monitor the job daily. Record all drying data and keep accurate records.
- Dispose of any non-dryable items. Ensure you document and have approval of the homeowner/insurance company before doing so.
- Reinstall the carpet with new pad after drying is complete.
- Replace all structure materials that were removed.
- After drying is complete, all affected areas will need to be cleaned.
Water / Flood Restoration Category 3 Losses
The following information is intended for use as general guidelines for Category 3 water loss cleanup. No two water losses are alike, and each situation must be treated based on the unique needs of the environment. Before tackling any water loss it is recommended that professionals attend an IICRC WRT Class.
Category 3 water loss involves water that is grossly contaminated and can contain pathogenic, toxigenic, or other harmful agents. Such water may carry silt, organic matter, pesticides, heavy metals, regulated materials, or toxic organic substances.
Examples include, but are not limited to: sewage, toilet backflows that originate from beyond the toilet trap regardless of visible content or color, all forms of flooding from seawater, ground surface water and rising water from rivers or streams, and other contaminated water entering or affecting the indoor environment such as wind-driven rain from hurricanes, tropical storms, or other weather-related events.
Basic Procedure
- Complete work contracts. No work should be started without completed authorizations.
- Identify any safety hazards (electrical wires in standing water, loose/buckling drywall, etc.).
- Locate the source of the water and stop any further intrusion. It may be required to contact a professional plumber or other contractor.
- Protect furniture by blocking. Small items can be moved out of the affected area.
- If possible use a negative air scrubbing machine with hepa filter for ambient air filtration.
- Extract water from carpet and/or pad using a sub-surface extraction tool. Remove water from hard surfaces via squeegee or mop. All dehumidifiers should be turned on to give the coils time to reach dew point temperature.
- Apply a biocide to all affected surfaces to help prevent and retard the growth of microbials.
- Remove and dispose of carpet and carpet pad from all affected areas. Remove and discard all contaminated porous and semi-porous structural materials.
- Inspect all areas that water may have traveled. Document all moisture levels in affected areas.
- Create a drying chamber. Remember, you only want to dry the areas that are wet.
- Install air movers (approx. every 10-15 linear feet). All air movers should be blowing in the same direction.
- Monitor job daily. Record all drying data and keep accurate records.
- Dispose of any non-dryable items. Ensure you document and have approval of the homeowner/insurance company before you do.
- Reinstall carpet with new pad after drying is complete.
- Replace all structure materials that were removed.
- After drying is complete, all affected areas will need to be cleaned.
Water Mitigation Is About Science
We use a process called Applied Structural Drying. We use science as our guide and take the guess work out of the equation. We will use safisticated tools to measure moisture content, relative humidity and temperature. Once we have all of our readings we can then begin to put them in to our water mitigation formula to determine which flood restoration equipment is needed and how long it is needed for.
in the affected materials and the knowing the Our knowledge of water mitigation is extensive because of our commitment to continuous education training. Our goal is to leave your home in tact and extract the moisture without the need of demolition.
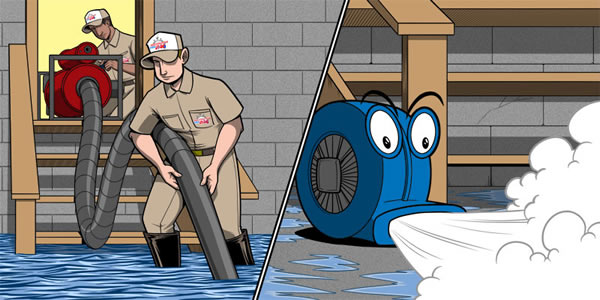
Step 1: Water Removal And Water Extraction Process
We will use our high efficiency truck mounted and portable extraction units to perform efficient water cleanup. Fine water extraction tools will be used to remove all standing water and hard to reach water.
Step 2: We begin the drying and dehumidification process
We use industrial grade dehumidifiers to manipulate the temperature and relative humidity. High-speed air movers create airflow across walls, carpets, pads and furniture, evaporating moisture. Some situations call for special drying techniques that requires our high tech equipment to prevent cupping and curling of hardwood floors and subfloors.
Step 3: Cleaning And Sanitizing The Affected Flood Area
- Deodorization products control odors from excessive moisture.
- Disinfection products stop the growth of bacteria, fungi, mildew, and other harmful microorganisms.
Step 4: Flood Restoration to repair your home or business
Flood restoration is the final step of the process. Your home or business may require repairs such as drywall, paint, new carpet, base boards or even new hardwood floors.
Need Help Now? We Can Help! 319-213-9120
Residential Flood Restoration Services
- Water Damage Restoration
- Fire Damage Restoration
- Mold Remediation
- Board-Up
- Roof Tarp
- Packing And Storage Of Contents
- Property Repairs
Commercial Flood Restoration Services
- Commercial Water Damage Restoration
- Commercial Fire Damage Restoration
- Commercial Flood Mitigation
- Commercial Mold Remediation
- Commercial Building Board Up
- Commercial Roof Tarps/Liquid Roof Patch
- Commercial Property Repairs


 From water cleanup to restoration,
you can depend on our team at
RESTRORATION PRO 24.